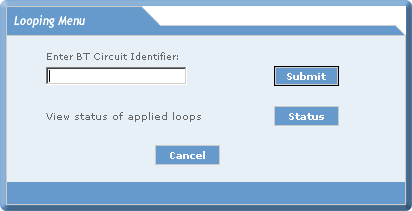

| Allows you to perform circuit looping on private circuits (Kilostream and Megastream) and view the status of applied loops after completing the Security Check. |
| Note: If you perform an Alarm Check on a private circuit via the: | ||
|
§
|
Private Circuit Alarm Check on the Diagnostic menu, | |
| or the | ||
|
§
|
Create Fault process, | |
| and proceed to peform Circuit Looping on the same private circuit within ten minutes of the orginal Alarm Check, the Alarm Check for the circuit will not be automatically repeated as part of the Routing Diagram process. | ||
| The Security Check test ensures that only authorised personnel can perform circuit looping on external customer circuits. |
|
The Security Check is applied when you first select Circuit Looping from the Diagnostic Menu Bar during your current eCo.Repair session. |
|
Your Security Check takes the form of a Memorable Information test, where you have to enter three characters or numbers at a specified position within your Memorable Information. |
| You perform circuit looping by: |
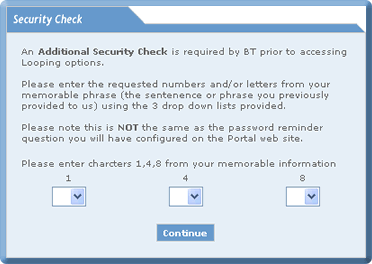
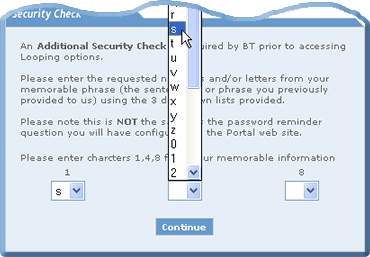
| 1. | Select from the three-drop down menus the characters in your Memorable Information which correspond to the number displayed above the drop down menus. |
| Note: The sequence of numbers displayed above the drop down menus are randomly generated. |
|
Note: Your Memorable Information could be a word, for example, sunshine01, so the 2rd, 6th and 8th characters would be u, i and e. |

| You can change your Memorable Information, see GETTING STARTED, how to CHOOSE SETTINGS, how to Choose Security Check Settings. |
| 2. | Select the Continue button.
The Looping Menu window will be displayed. |
| How to Perform Kilostream Circuit Looping |
|
Allows you to perform circuit looping on a kilostream circuit. The purpose of looping is to prove that a fault is either on or off your own network. |
| You perform looping by: |
 |
|||
|
1.
|
Entering your BT Circuit Identifier number. | ||
|
2.
|
Selecting the Submit button. | ||
| The following window is displayed whilst validation takes place: |

| Validation ensures that the circuit you are trying to
loop belongs in your inventory. |
||
|
Both the Customer Name and the A and B
End Addresses will be displayed. Also, if there is an open fault against
the circuit the fault details will be displayed.
|
||
| Looping is not permitted on circuits that have open faults raised against them unless the status is: | ||
|
§
|
Cleared fault waiting Customer Confirmation | |
|
§
|
Cleared fault awaiting Closure. | |
|
If a Fault Exists:
(looping NOT permitted) |
|
If a Fault Exists:
(looping permitted) |
|
The following message is displayed: 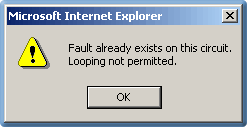
|
|
The following window is displayed: After circuit validation: 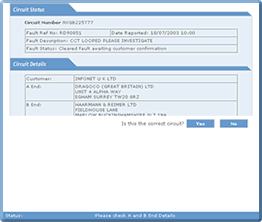
You have now started the looping process, for further details about applying a loop, proceed through this section. |
|
Select the OK button. |
|
|
And the Circuit Status and Circuit Details
window is displayed: 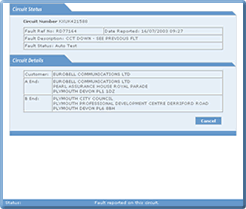
Select the Cancell button. |
|
|
If there are no fault on the circuit:
|
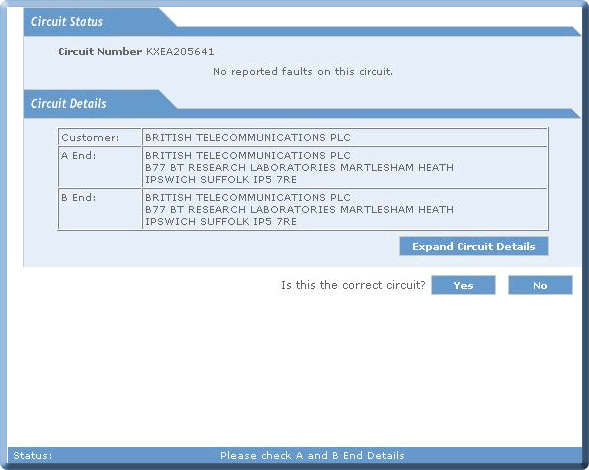
| On Click of Expand Circuit Details button |
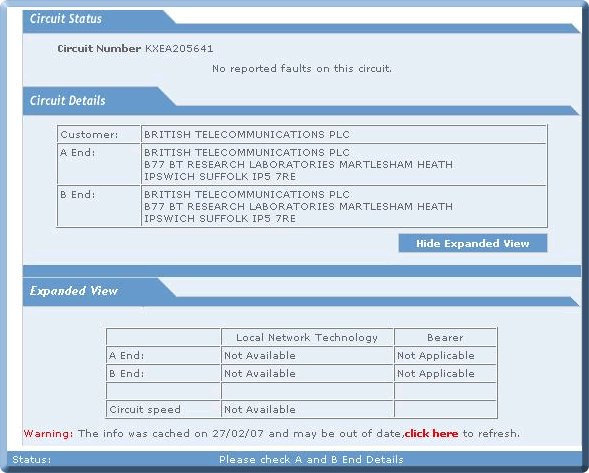
| It Show the Technology type details of the circuit |
| Check the Circuit Details: | ||
|
§
|
Customer. | |
|
§
|
A End address. | |
|
§
|
B End address. | |
| 4. | If the Circuit Details are correct select: |
| If you select the No button you are returned to the Looping Menu window. |
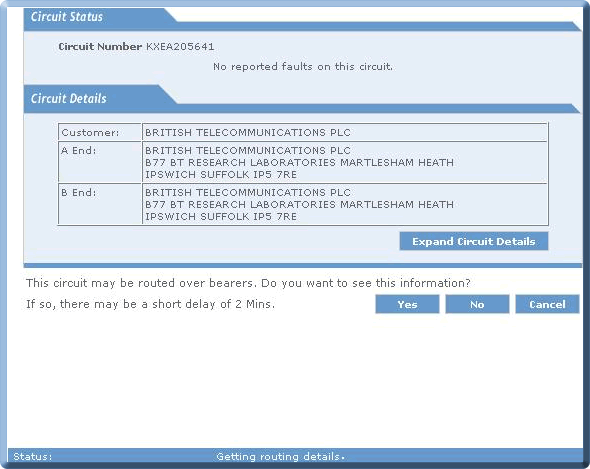
| For KX,NX and AX circuits you will be asked whether you want to select bearer circuit or not? |
|
If you select the Cancel button you will be returned to the Looping Menu window. If you select the Yes button the Bearer Routing Diagram details are retrieved. |
| While the Bearer Routing Diagram is being retrieved you can see the status as: |
| When the Bearer Routing Diagram has been validated: |
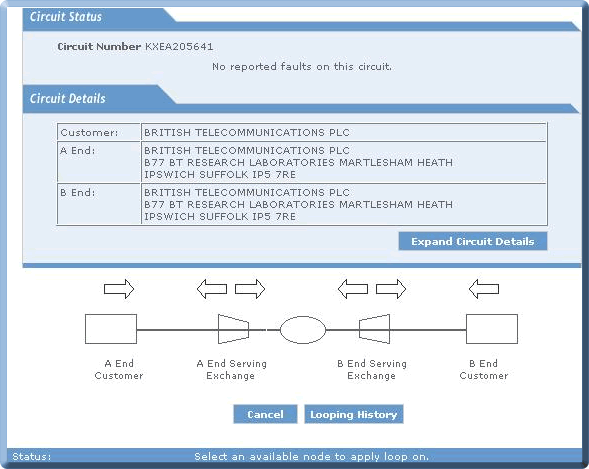
| On Click of Looping History Button |
| It displays the latest loop applied on any Location within last one year |

|
A Routing Diagram consists of: |

| The Loop Status can be: | ||
|
§
|
Normal. | |
|
§
|
Looped. | |
|
§
|
Loop not Available. | |
|
§
|
Unknown. | |
|
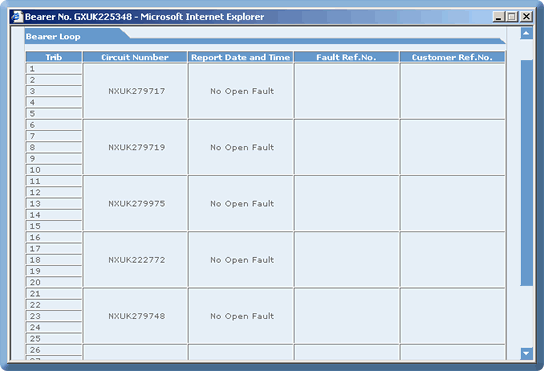
Both the Bearer circuit PCD's are displayed at the bottom of the diagram. If the circuit is routed over an aggregate bearer at any end, the bearer circuit's PCD will be displayed as a hyperlink. If the user clicks on the hyperlinked aggregate bearer PCD, new window will
pop-up. This window will display the following information about the routed
circuits in a tabular format: -
|
| 5. | If you select the No button then the Routing
Diagram details are retrieved. This extra question is asked only for KX,NX and AX circuits. For other circuits only first question is asked.There on selectingYes the Routing Diagram is displayed. |
| While the Routing Diagram is being retrieved: |
| When the Routing Diagram has been validated: |

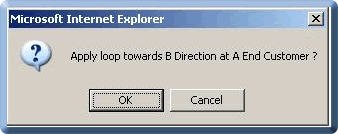
| 6. | Click on the arrow above the node in the direction in which the loop is to be applied: |

| A message will be displayed: |
| 7. | Select the OK button. |
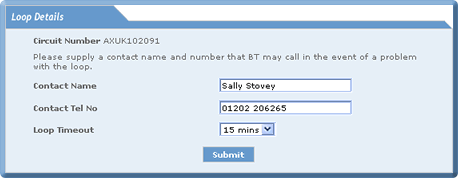
| The Contact Name and Contact Tel No are automatically pre-populated in the Loop Details window. |
| 8. | Select the time from the Loop Timeout drop down menu. |

|
The drop off times which apply to loops that are not manually removed. |
| 9. | Select the Submit button. |

| Next a confirmation message will be displayed: |

| 10. | Select the OK button. You will be returned to the Diagnostic Menu window. |
| How to Perform Megastream Circuit Looping |
| Allows you to perform circuit looping on a megastream circuit.The purpose of looping is to prove that a fault is looping to a customer or to a network. |
| You perform looping by: |
 |
|||
|
1.
|
Entering your BT Circuit Identifier number. | ||
|
2.
|
Selecting the Submit button. | ||
| Note: All megastream circuits numbers begin with the prefix MXUK. |
| The following window is displayed whilst validation takes place: |

|
Validation ensures that the circuit you are trying to loop belongs in your
inventory. Both the Customer Name and the A and B End Addresses will be displayed. Also, if there is an open fault against the circuit the fault details will be displayed. Looping is not permitted on circuits that have open faults raised against them except if the status is Cleared not Closed. All other fault statuses cannot be looped. |
|
If there is no fault on the circuit:
|
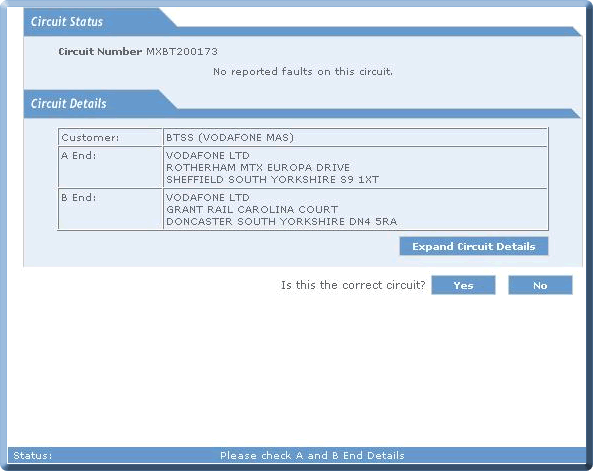
| 3. | Check the Circuit Details: | |
|
§
|
Customer. | |
|
§
|
A End address. | |
|
§
|
B End address. | |
| 4. | If the Circuit Details are correct select: |
| If you select the No button you are returned to the Looping Menu window. |
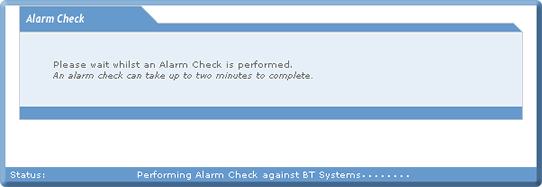
| An Alarm Check will be performed next: |
| When the Alarm Check has been completed: |
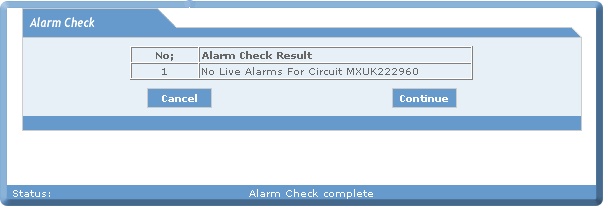
| 5. | Select the Continue button. If you select the Cancel button you will be returned to the Looping Menu window. |
Note: If you have previously
performed (within ten minutes) an Alarm Check on the circuit the
following window will be displayed: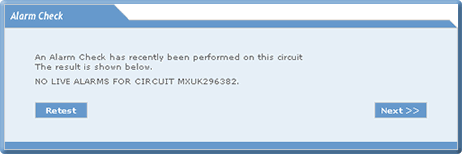
If you select the Nextbutton the Routing Diagram details are retrieved. If you select the Retest button the Alarm Check is re-tested. |
| While the Routing Diagram is being retrieved: |
| When the Routing Diagram has been validated: |
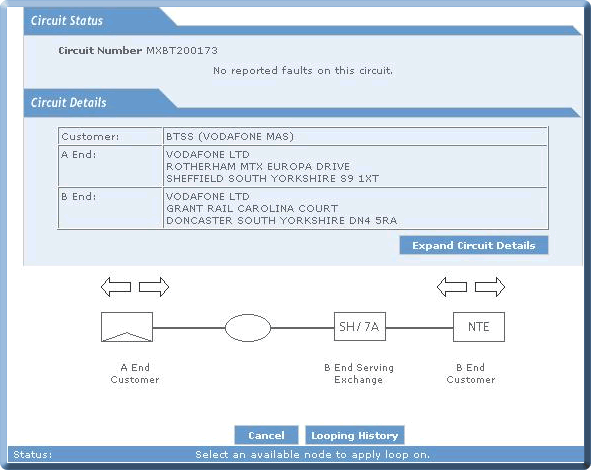

Note: If you hold the cursor
over a box information about the circuit is displayed: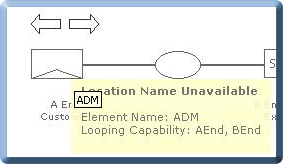
|
| The looping capability displayed can include: | ||
|
§
|
Customer. | |
|
§
|
Network. | |
|
§
|
A End. | |
|
§
|
B End. | |
|
§
|
None. | |
| 6. | Click on the arrow above the node in the direction in which the loop is to be applied: |

| Note: Loops can be applied: | ||
|
§
|
towards Customer. | |
|
§
|
towards Network. | |

| 7. | Select the OK button. |
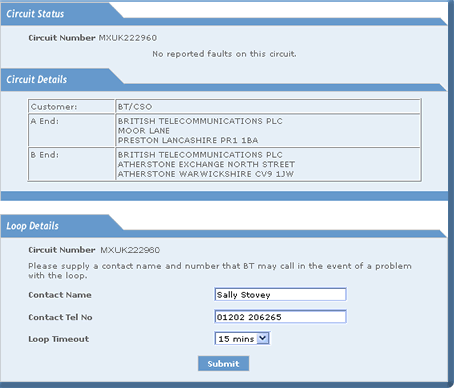
| The Contact Name and Contact Tel No are automatically pre-populated in the Loop Details window. |
| 8. | Select the time from the Loop Timeout drop down menu. |

|
The drop off times which apply to loops that are not manually removed. |
| 9. | Select the Submit button. |
| While the loop is being applied to your selected node: |

| When the loop has been applied a confirmation message will be displayed: |

| Notes: | |||
| 1. | Please be aware it can take up to 2 minutes to apply a loop. If a loop fails a detailed error message will be displayed advisingyou whether or not to re-attempt to apply a loop. | ||
| 2. |
It is possible that a node displaying looping capabilities in eCoRepair
does not support looping. When this event occurs, please read the following
explanation.
|
||
| “The network architecture that supports network looping of wideband Local Exchange Equipment (LTEs) and Customer Sited Equipment (NTEs) is complex; and relies on BT’s network control systems communicating with a number of record systems: | |||
|
§
|
site location, | ||
|
§
|
circuit ownership, | ||
|
§
|
equipment type records. | ||
| to successfully apply and remove a loop at the
required location - all these systems must align. |
|||
| The looping capability for wideband is still relatively new and BT is working to improve its performance in terms of speed of response and success rate in applying loops. Currently it can take 2-minutes to apply a loop for both BT and eCoRepair customer with a success rate of about 60% of loops successfully applied. For the duration of the inter-working tests, please inform BY of any loops that fail to apply so these can be investigated.” | |||
| 10. | Select the OK button. You will be returned to the Diagnostic Menu window. |
| How to Perform looping on circuits having XTS node |
| Allows you to view Routing Diagram of circuits having XTS node and apply loops on nodes next to XTS node. |
| After going through the initial security check of the logged in user, if the circuit contains an XTS node then routing diagram of the entered circuit will be displayed as given below and node next to it will be loopable. |

| How to View the Status of Applied Loops |
| Allows you to view the status of applied loops either from a general status view or a specific status view. |
| You view the status of applied loops by: |

| 1. | Select the Status button.
(General Status View) |
| or | |
| Enter the BT Circuit Identifier No. Select the Status button. (Specific Status View) |

| 2. | Select the Search button. (General Status View) |
| or | |
| Enter Circuit Number. Select the Search button. (Specific Status View) |
| If loops have been applied: |

| Note: The Circuit Number entered is displayed in the Search window during the Specific Status View. |
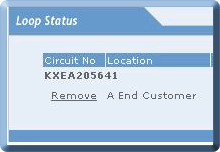
| 3. | To remove a loop select: |
|
| The following message is displayed: |

| While the looping is being removed: |

| Once all loops have been removed: |

| 4. | To view the Routing Diagram |
| While the Routing Diagram is being generated: |
| After the Routing diagram has been generated: |

|
| The red elements represent the segment of the line to which a loop has been applied: |
| 5. | Select
the Close button.
The Search window will be re-displayed. |
| If no loops have been applied: |

| Note: The Circuit Number entered is displayed in the Search window during the Specific Status View. |
|
Below the circuit details the expanded view of the circuit details will be availble.
|
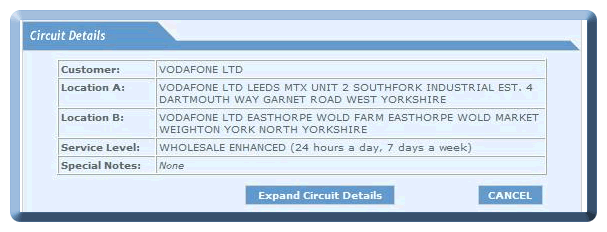
| Click on the Expand Circuit Details button to the expand the Circuit details view. The new tab "Expanded View" will be displayed. |
|
The expanded view displayes the details like Circuit Speed, Local Network Technology (For A & B end) and Bearer circuits ( for A & B end).
|
| The expanded view for the circuits with prefix "MX" is |

| The expanded view for the circuits with prefix "NX" & "KX" is |

| The “Click Here” link in the above pictures will refresh the Technology Type information. This brings the latest technology type information from the database and displays here. |
| The “Hide Expanded View” button makes the Technology type information invisible. |
| Nov 2008 Issue 08.11 eCo.Repair Version 6.0 |
|
© British Telecommunications plc 2009
|