|
ISDN2, ISDN2 Home Highway or PSTN faults are BT telephone
numbers which are channelled through BT telephone lines. |
|
Notes: |
||
|
1. |
To utilise this functionality you will require
additional permissions on your
eCo.Repair account.
|
|
|
2. |
The fault report options displayed will correspond to your
access permissions. |
|
|
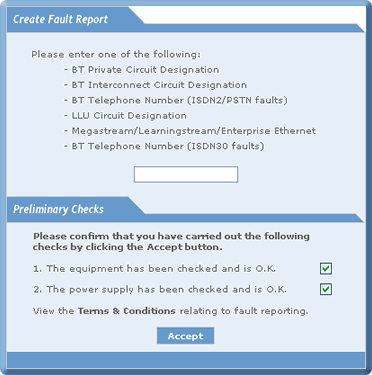
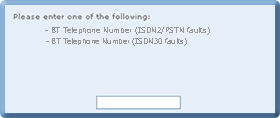
To create an ISDN2 or PSTN Fault Report enter the
following: |
|
|
1. |
A valid ISDN2 or PSTN telephone number. |
|
2. |
Confirm both the preliminary checks. |
|
3. |
Select the Accept
button. |
|
Notes: |
|
|
1. |
If you do not confirm both settings in the Preliminary Checks windows a warning message will be displayed, see CREATING
A FAULT REPORT, how to CREATE A PRIVATE CIRCUIT FAULT REPORT. |
|
2. |
To display the create fault process a PSTN telephone number
has been used. |
|
3. |
If the number is a single number DDI number then the following message will be displayed You can create a fault against this SNDDI number.
|
|
While
eCo.Repair is searching and validating the ISDN2 or
PSTN fault relating to the fault number entered, the following window is
displayed:
|

|
After your ISDN2 or PSTN fault has been validated, if
there is a fault currently open on the ISDN2 or PSTN number entered:
|
|
4. |
Select the OK
button. |
|
|
|
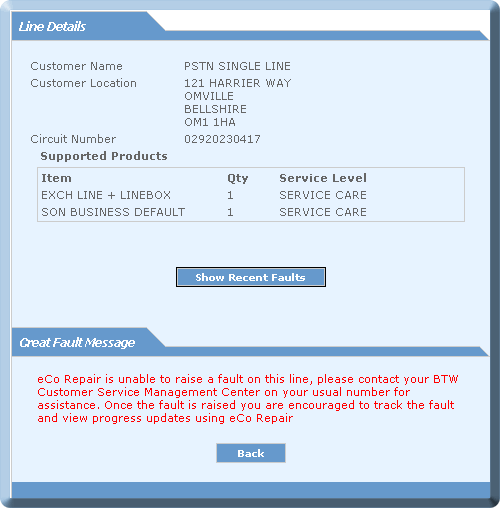
Note: WLR3 PSTN / ISDN faults cannot be raised by accessing eCo Repair ROBT. Please note the create fault Message. To raise a fault on such type of circuits BTW Customer Service Management Center needs to be contacted. Once the fault is raised you are encouraged to track the fault and view progress updates using eCo Repair |
|
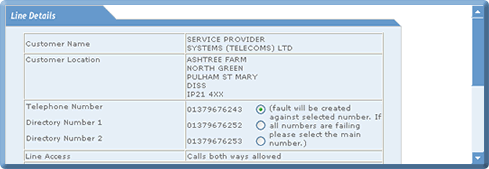
If you have entered an ISDN2 Home Highway telephone
number the following Line Details
window will be displayed: |
|
The telephone numbers displayed in the Line Details
window consist: |
|
§
|
Telephone Number
- is an ISDN2 telephone number. |
|
§
|
Directory Numbe
r 1 - is an PSTN telephone number. |
|
§
|
Directory Number
2 - is an PSTN telephone number. |
|
Select a radio button next to the number you want to
create a fault report for. |
|
|
|
|
|
Note:
Although one ISDN2 Home Highway and two PSTN
telephone numbers are displayed, to view a recent fault you must select
the corresponding radio button for the ISDN2 or PSTN telephone number
before selecting the View Recent
Faults
button. |
|
![]()
|
At the base of this frame a Status bar provides details about the current
state of the fault. |
|
Note:
If you select the
Cancel button the create
fault process is halted and you will be returned to the
Create Fault Report window.
|
|
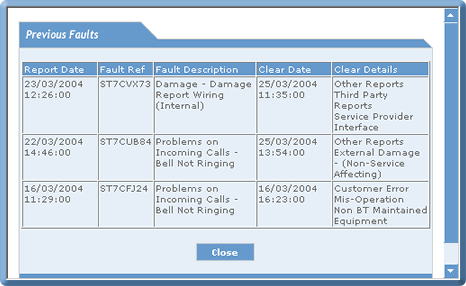
You can view recent faults by:
|
|
| § |
Selecting and dragging down the Line Details slide bar to the base of the bar.
|
|
|
|
|
§
Selecting
the
|
|
|
If you select the Close
button the Previous
Fault
window is removed from your screen and you will be
returned to the Create Fault Report window.
|
|
At the base of the ISDN2 and ISDN2 Home Highway Create Fault Report
window
Line Marker
details are displayed. |
|
|
Line
Markers
give Service Providers visibility of the network
services on a line. |
|
|
Note:
The prescence of some Line Markers
may cause an incorrect
line test to be performed.
eCo
.Repair
recognises these instances and
suspends the line test service. |
|
|
You can
view recent faults by:
|
|
| § | Selecting and dragging down the Line Details slide bar to the base of the bar. |
|
|
|
|
§
|
|
| Progress bar will be displayed. |
 |
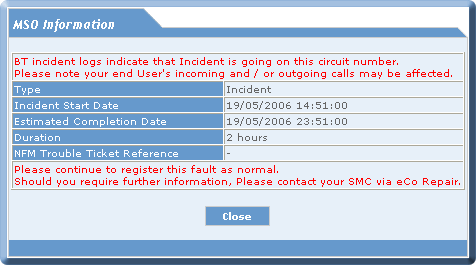
| If MSO is present on that circuit id then Information
will be displayed in a pop-up window, as shown below. |
 |
| If the circuit is not involved in MSO following pop
up window will be displayed. |
 |
| If there is problem in fetching the details then
following pop up window will be displayed . |
 |
|
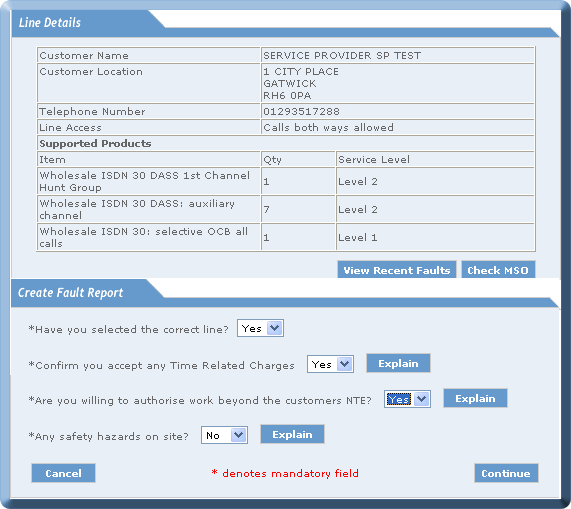
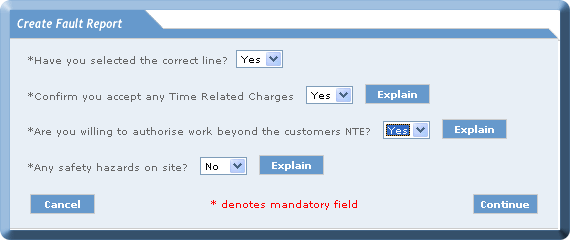
In the Create
Fault Report window: |

|
5. |
From the Have
you selected the correct line? drop down menu, select Yes or No to the question. |
|
|
6. |
From the Fault
Type drop
down menu: |
|
|
|
Select one of the fault types. |
|
|
Following is TRC
|
|
On Click of Explain following screen will apper
|
|
Notes: |
|||
|
1. |
If you enter
an ISDN2 or PSTN telephone number and select from the
Fault Type
drop down menu:
|
||
|
|
ISDN2 or PSTN Number |
|
PSTN Number Only |
|
|
|
|
|
|
|
the following
options can be chosen from the
Fault Report
drop down menu:
|
||
|
|
|
|
|
|
2. |
The options displayed in the Select Service on Line
drop down menu
reflect the product application available to the individual line. |
||
|
3. |
If you choose the Select Service on Line
option you can
create a
Fault
Report
for a specific service on your telephone line. |
||
|
4. |
The Select Service on
Line
details are displayed in the
Create Fault Report
window under the
Supported Products
heading. |
||
|
5. |
If you choose the Slow Dial-up Speed
option a request for
Gain Balancing
will be created which
will be evaluated by BT. |
||
|
6. |
If Slow Dial-up
Speed
is selected the normal fault details included in the
Create Fault Report
will not be
progressed. |
||
|
7. |
From the Fault
Report drop down menu: |
|
|
|
Select a fault report type. |
|
|
Note:
If you enter an ISDN2 telephone number two
extra Fault
Report
selections will be displayed: |
||
|
The Fault Report
type selected will determine if an appointment can be made
for an engineer to visit the customer’s site. |
|
WARNING:
|
|
|
If other services or equipment exist on your line
they may interfere with the standard ISDN2 or PSTN line testing facilities
and result in a line test not being performed. Also you may experience the
same result if a major exchange problem exists as this will cause
disruption to the line test facility. |
|
8. |
From the Confirm
you accept any Time Related Charges drop down menu: |
|
|
|
Select one of the replies. |
|
|
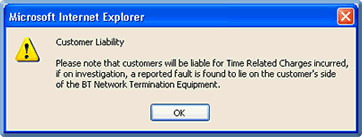
Note:
For an
explanation of
Time Related
Charges
select the
Explain
button and the following message will be
displayed:
|
|
9. |
From the Any
safety hazards on site? drop down menu: |
|
|
|
Select one of the replies. |
|
|
Note:
For an
explanation of
Any safety hazards on
site
select the
Explain
button and the following message will be
displayed:
|
|
10. |
From the Do
you have a direct relationship with the end customer? drop down menu, select Yes
or No to the
question. |
|
The Do
you have a direct relationship with the end customer? field allows you to identify and
name third party Service Provider, for example: |
|||
|
|
BT supplies, |
||
|
|
|
Blue Services Limited who supplies, |
|
|
|
|
|
Trading Limited. |
|
The third party relationship (the premises the BT
engineer will visit) is between BT and Trading Limited. There is no
relationship between Blue Services Limited and Trading limited. |
|||
|
Notes:
|
|
|
1. |
If you select Yes,
the
Who the Engineer is Representing?
field
is
NOT
displayed in the
Create Fault
Report
window. |
|
2. |
If you select No,
the
Who the Engineer is Representing
? field
is displayed in the
Create Fault
Report
window. |
|
11. |
Select the Continue
button. |
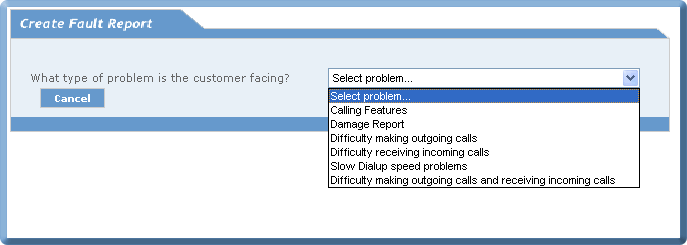
After answering all the questions Click the Submit button:

|
Notes: |
|
|
1. |
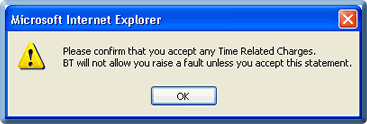
If you selected No
to the question
Confirm you accept any Time Related
Charges
the following message will be displayed: |
|
2. |
If you selected Yes
to the question
Any safety hazards on site?
the
following message will be displayed: |
|
WARNING:
|
|
12. |
Select the OK button. |
|
Notes
: |
|
|
1. |
If you select the Cancel
button: |
|
|
will be followed by the message: |
|
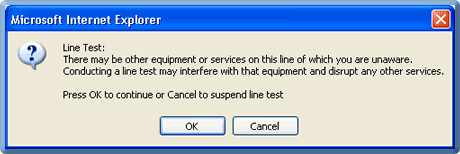
2. |
If you enter an ISDN2 telephone number, select the
Cancel
button, after the
Line Test
window has appeared the
message
Line Test Cannot be
Completed
is displayed in the
Line Test Results
window. |
|
3. |
Although the line test has been suspended you will be
able to proceed and create a fault. |
|
13. |
Select the OK
button. |
|
If the line
test fails the following window is displayed:
|
|
Once the Line
Test has been performed the results are displayed:
|
|
After the Line
Test Results has been displayed the Create Fault Report window appears: |
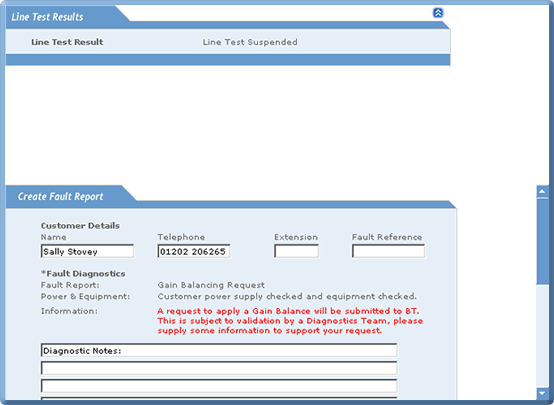
|
Note:
Click the |
|
button in the top right of your screen to roll-up
|
|
the top panel so that the remainder of the
information can be viewed. |
|
14. |
Enter your Contact
Details: |
|
|
|
§
|
Name. |
|
|
§
|
Telephone. |
|
|
§
|
Extension |
|
|
§
|
Fault Reference. |
|
Notes: |
|
|
1. |
Your name and telephone number will be pre-populated
from your Fault
Report
form. |
|
2. |
The Extension field will accept four
alpha-numberic characters. |
|
15 |
Using the slide bar on the Create
Fault Report window scroll down to display
further data entry fields. |
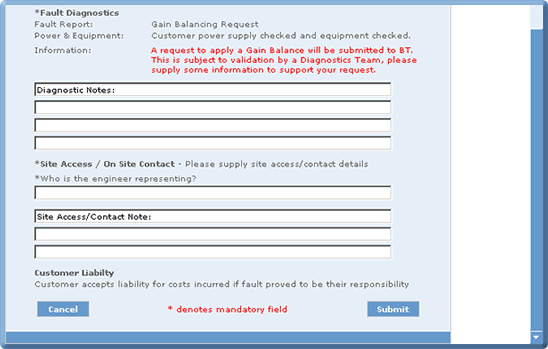
|
If you enter a ISDN2, PSTN or Wholesale multi-line
telephone number which is a business line the End Customer Details
fields will be
displayed: |
|
|
|
16. |
Enter your Diagnostic Notes
. |
|
17. |
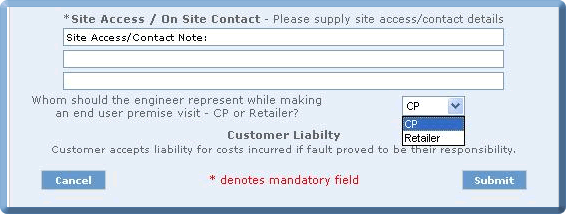
Enter Who the Engineer is
Representing
? |
|
Note:
If you previously selected No
to the question
Do you have a direct relationship with the end
customer?
in the
Create Fault Report
window, the
field
Who is the engineer
representing?
will be displayed. |
|
18. |
Enter the SiteAccess/On Site Contact Notes
. |
|
19. |
Enter the Service Provider Name
and your
Company Name
. |
|
Note:
The End Customer
Details
fields are only displayed if the telephone number
entered is an ISDN2, PSTN or a Wholesale multi-line business number. |
|
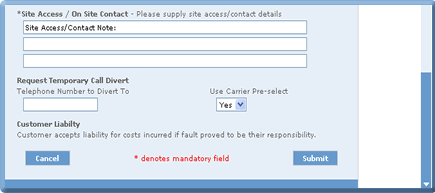
20. |
Enter the telephone number to which the Temporary Call Divert
will be
applied.
|
|
21. |
Select from the Use Carrier Pre-select
drop down menu a
reply. |
|
|
|
22. |
Select the Submit button.
|
|
The Status bar indicates
that the fault has now been submitted. |
![]()
|
After a short delay the Submit Report
will be displayed: |

|
If you selected a Fault Report
type which did
NOT
perform a line test you can now
create an appointment for an engineer to visit the site by: |

|
23. |
Select the Continue
button. |
|
WARNING: |
|
After the Loading
Appointment Details window has been displayed briefly: |
|
|
|
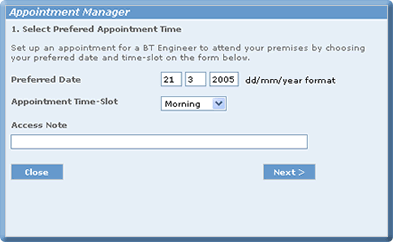
24. |
Enter the day, month and year in the Preferred Datefields
. |
|
25. |
Select the appointment time from Appointment Time - Slot
|
|
26. |
In the Access
Notes
field enter: |
|
|
|
§
|
Contact name. |
|
|
§
|
Contact telephone number. |
|
|
§
|
Site access details. |
|
27. |
Select the Next
button. |
|
The Checking
Appointment Booking window is displayed: |

|
Note:
If you select
the
Close button before selecting an appointment slot
the appointment will not be created
. |
|
28. |
Select an appointment from the available list by
clicking on a time-slot. |
|
|
Note:
Because there is no validation, once you have
selected a time slot the appointment is automatically created.
|
|
The Creating
Appointment
window is displayed briefly: |
|
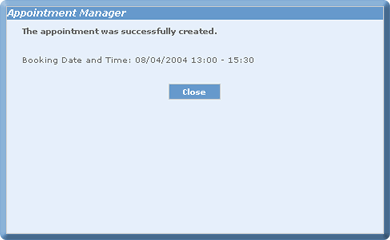
The date and time of the appointment is displayed in
the Appointment
Manager
window. |
|
29. |
Select the Close button.
|
|
Nov 2008 Issue 08.11 eCo .Repair Version 6.0 |
|
© British Telecommunications plc 2009 |








.gif)
